Configuring a calibrated fuel volume sensor
Who can do it: Service provider
Where: Wialon Platform Studio
The Fuel volume (calibrated) sensor shows how much fuel is in the tank, in liters, when the device doesn’t report it in liters. Many fuel level sensors and vehicles send raw values (quantization level, hertz, or volts) or the fuel level in percent. The Fuel volume (calibrated) sensor converts these values into liters using calibration data: a calibration table or the tank capacity.
The calibration table and capacity are stored separately for each device, and the sensor template you create defines only the calibration mode.
A device can have only one fuel volume sensor: either Fuel volume or Fuel volume (calibrated). If you replace the Fuel volume (calibrated) sensor with a Fuel volume sensor, the device’s calibration table and capacity are deleted. You can’t restore them, because they are stored in the device, not in the sensor template.
The calibration data you need depends on the type of value the device sends. The parameters in the table are examples. Set up other parameters with the same type of value the same way.
| Value type | Example parameters | What to configure |
|---|---|---|
| Raw value: quantization level, hertz, or volts | lls.value.X (quantization level), escort.lls.value.X (Hz), ain.X (V) |
Calibration table: pairs of raw values and the matching fuel volumes in liters |
| Fuel level in percent (0 to 100) | can.fuel.level, fuel.level |
Tank capacity |
| Fuel volume in liters | can.fuel.volume |
Calibration isn’t needed. Use the Fuel volume sensor with a formula. |
To configure a calibrated fuel volume sensor:
-
Select the device for which you want to add calibration data.
-
On the Sensors tab in the device properties, select Fuel volume (calibrated).
-
In the Sensor template field, select an existing template or Create new.
-
Enter the Sensor name.
-
In the Calibration mode field, select one of the following modes:
- table: Converts raw values into liters using a calibration table.
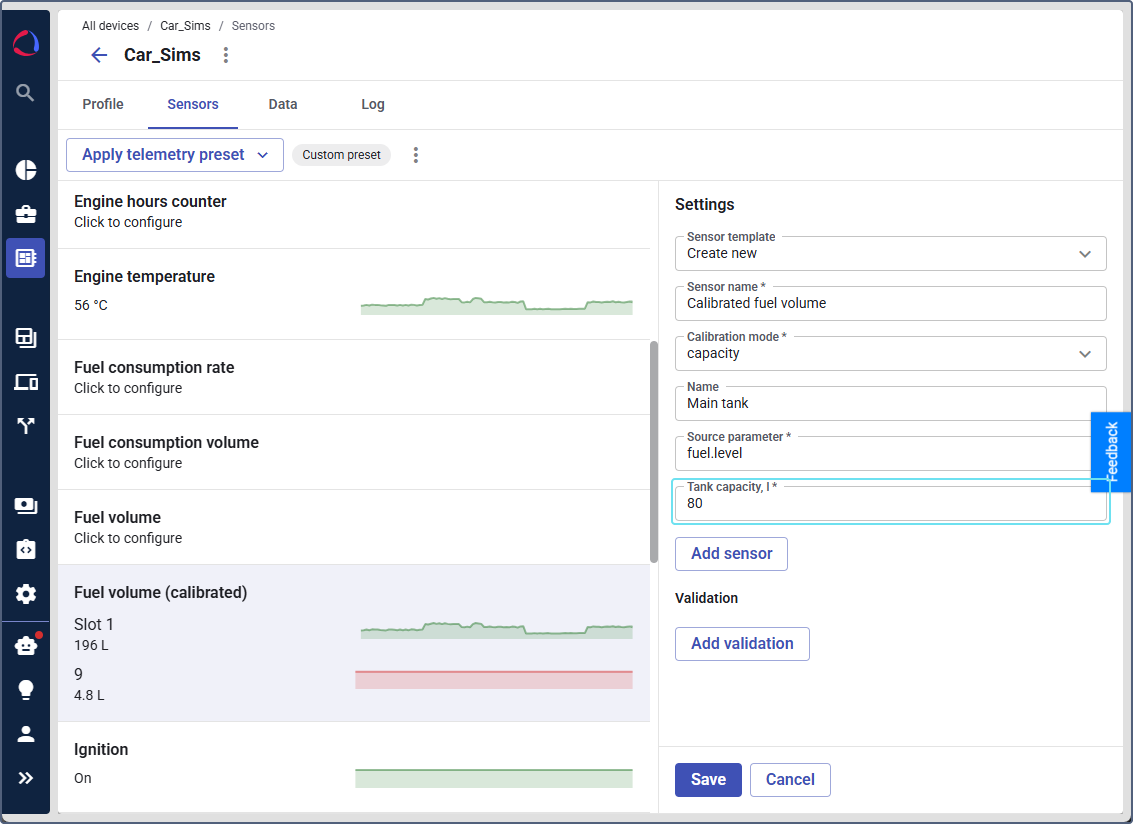
- capacity: Converts a fuel level in percent into liters using the tank capacity.
You can’t change the calibration mode after you create the sensor. To use another mode, create a new sensor.
-
(Optional) In the Name field, enter the name of the tank, for example,
Main tank. -
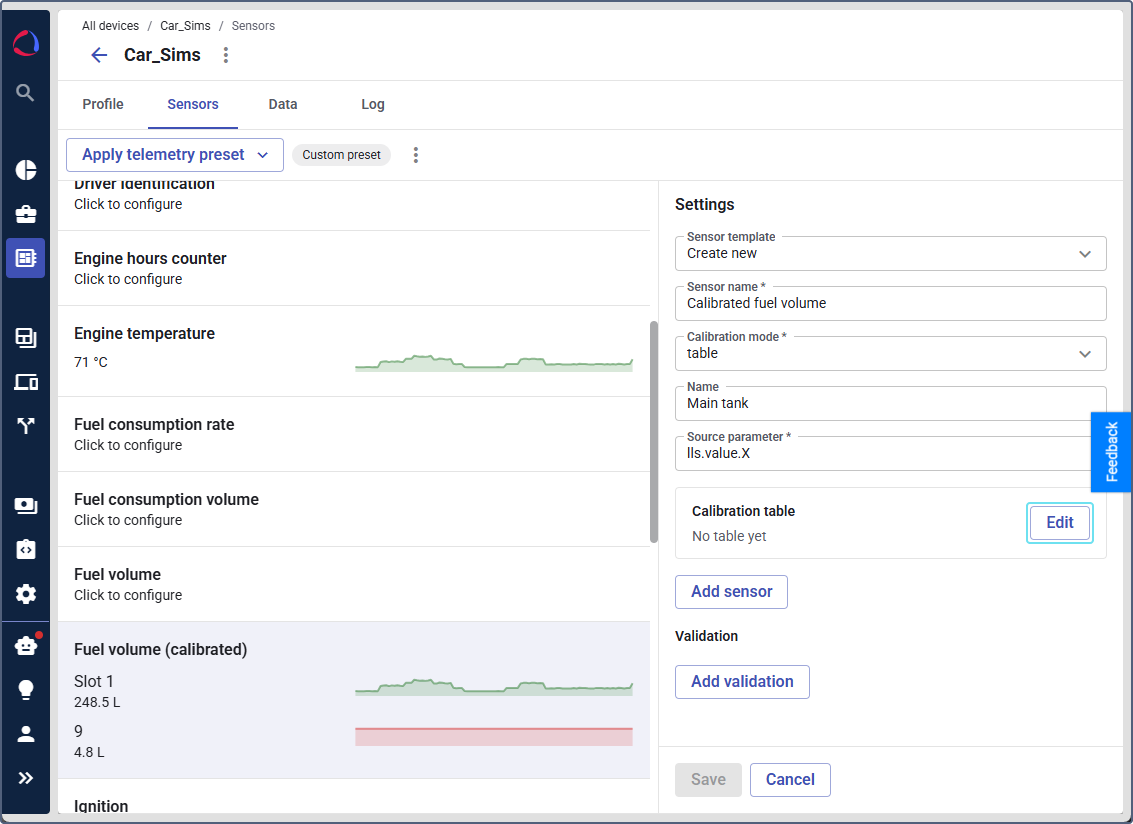
In the Source parameter field, enter the parameter that contains the raw value or fuel level in percent, for example,
lls.value.Xorcan.fuel.level. -
Depending on the calibration mode, do one of the following:
-
For the table mode, click Edit in the Calibration table section and fill in the table.
-
For the capacity mode, enter the Tank capacity, l. For example, if the tank capacity is 80 liters, a fuel level of 50% is converted into 40 liters.
-
-
If the vehicle has a second tank, click Add sensor and repeat steps 5–7 for it. You can configure up to 2 tanks in one sensor. If necessary, add validation conditions in the Validation section.
-
Click Save.
The calibrated sensor values are displayed on the Sensors tab separately for each tank.
When you assign a calibrated sensor to devices using a telemetry preset, only the sensor template is applied. Configure the calibration table or tank capacity for each device separately on the Sensors tab within the device.
Filling in the calibration table
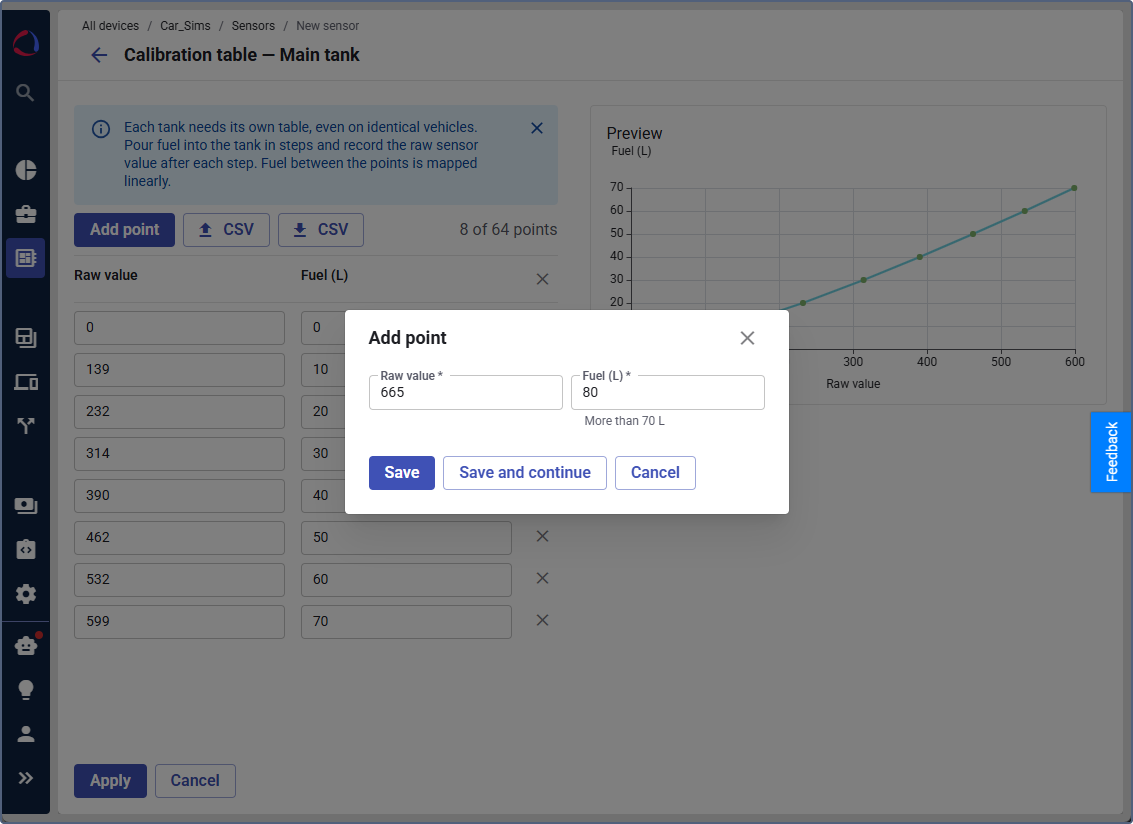
A calibration table contains pairs of values: a raw value from the sensor and the corresponding fuel volume in liters. To get these values, fill the tank in steps and record the raw sensor value after each step. The fuel volume between points is calculated linearly.
To fill in the calibration table:
-
Click Add point.
-
Enter the Raw value and the corresponding Fuel (L) value, in liters. Each raw value in the table must be unique. If a raw value is lower than the first point or higher than the last point, the sensor shows the fuel volume of the first or last point accordingly.
-
Click Save to add the point and close the window, or Save and continue to add the next point.
-
Repeat steps 1–3 for all points. You can add from 2 to 64 points to one table.
-
Check the curve in the Preview section. It appears when the table has at least 2 points.
-
Click Apply.
-
Click Save to save the calibration data and the sensor template for the device.
You can also edit values directly in the table or delete points. To remove all points, click the icon  in the table header.
To import a table from a CSV file, click CSV with the upload icon. To export the table to a CSV file, click the button  .
The table applies only to messages received after you save it. The platform doesn’t recalculate the sensor values for messages that were received earlier.